
Nano Banana 2 gives the highest accuracy when you pass structured JSON instead of raw text. It does not like plain text prompts.
I created a Claude skill that converts your text into clean JSON, adds concise context, and then calls Nano Banana 2 to generate, edit, compose, batch, and diagram images with much higher accuracy across logos, blog headers, and technical diagrams.
Install the skill, set your Gemini API key, and ask Claude to generate the images you want with Nano Banana 2.
You can switch models between Flash for speed and Pro for the best quality. All outputs save to a local nano-banana folder with clear prefixes like generate, edit, compose, batch, and multi-turn.
Why JSON improves accuracy?
Nano Banana 2 prefers an object that spells out subject, scene, style, mood, size, and constraints. Passing that structure produces stronger detail fidelity and far fewer misses.
The skill builds that JSON for you from your short prompt and augments it with precise context.
It also asks clarifying questions when your prompt is vague. That way the final JSON covers the right style, mood, and constraints before the image call. The result is consistently tighter alignment with what you want.
What the Ultimate Skill includes?
The skill converts your free text into a structured JSON prompt and sends it to Nano Banana 2. It supports generate, edit, compose, and batch, plus specialized commands for diagrams, flowcharts, architectures, and app icons. It can reference up to 14 images for composing or style transfer.
You can create presets for blog, social, story, or YouTube formats.
You can switch models by telling Claude to use Pro for the best quality or Flash for speed and lower cost. The skill also adds concise context so the model starts with the right constraints.
Read More: How To Install Claude Code In Antigravity
Setup
Install the Nano Banana Ultimate Claude skill on your local machine. After installation, open your project’s .claude/skills/nano-banana-ultimate folder.
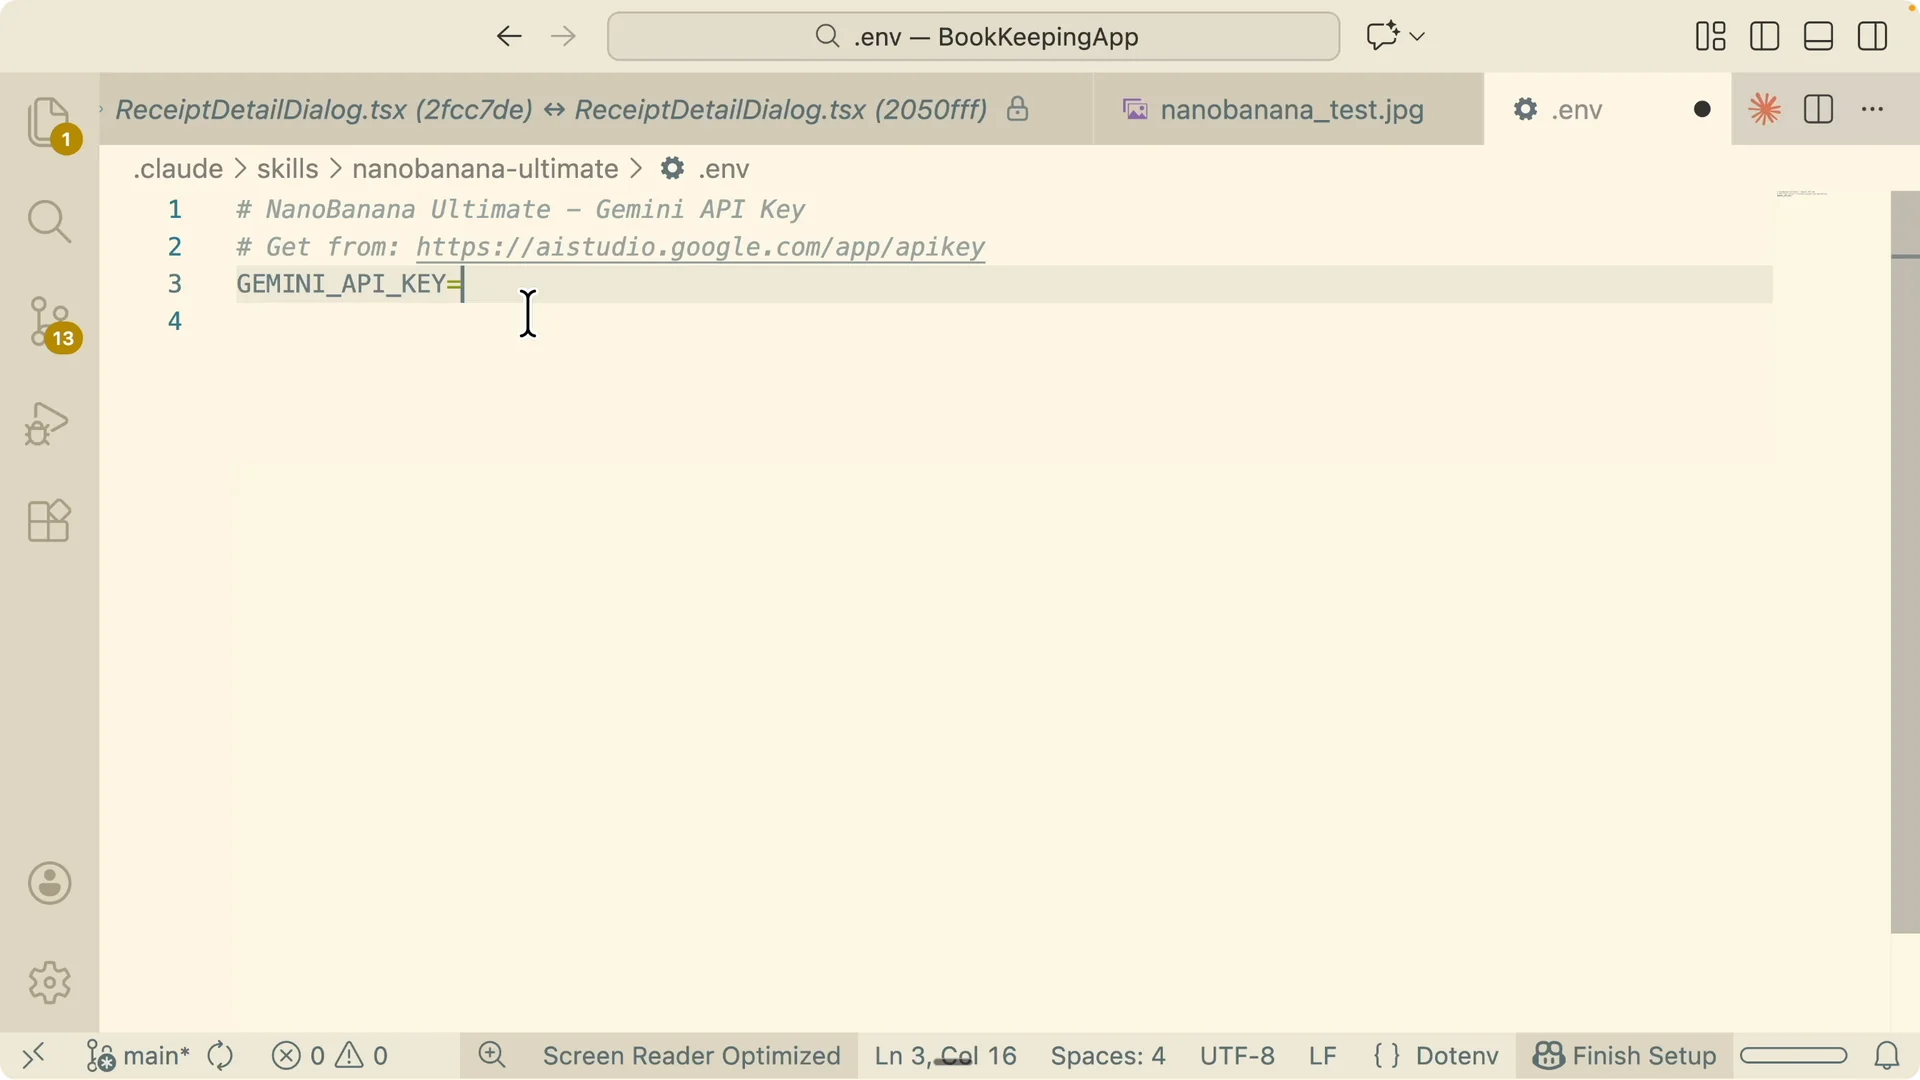
Create or edit the .env file and set your Gemini key like this: GEMINI_API_KEY=your_key_here.
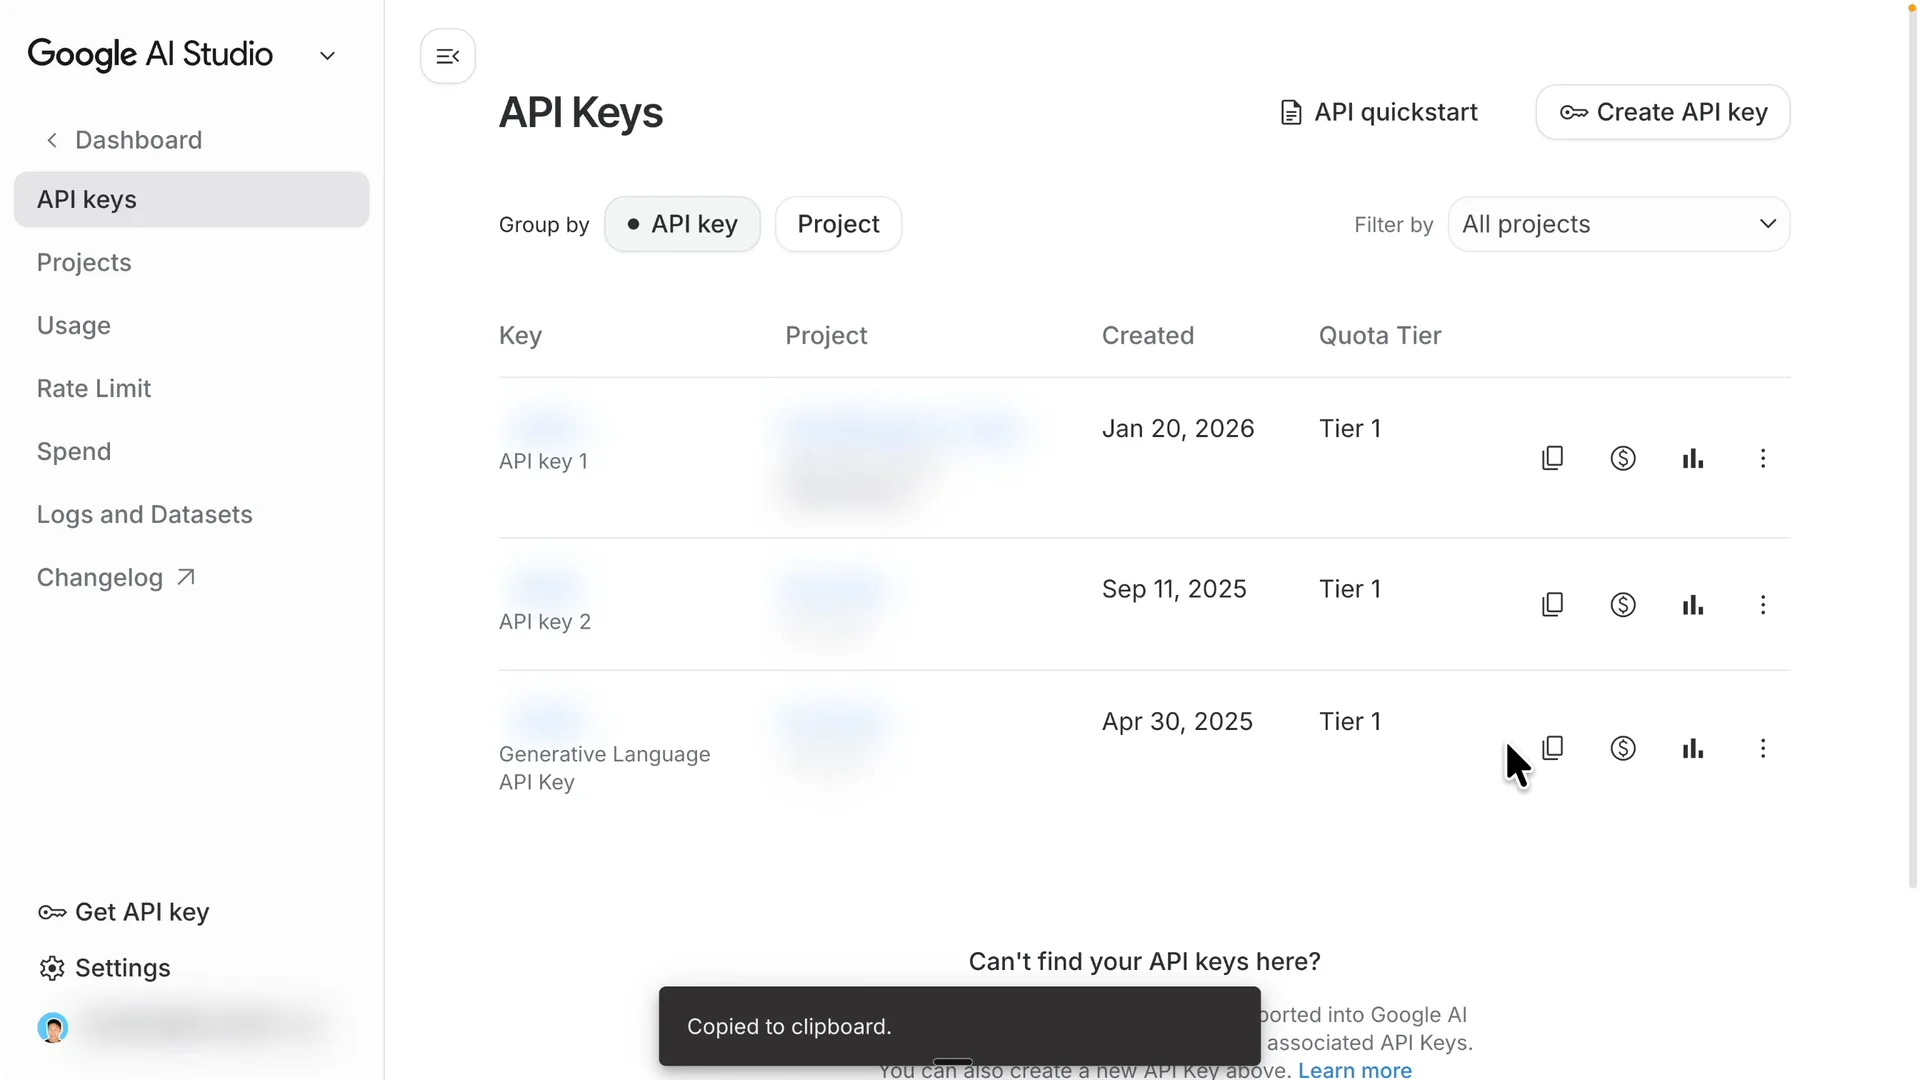
Go to Google AI Studio, create an API key, and copy it.
Paste that key into the .env file for the skill. Save the file and you can use the skill right away.
Folder structure
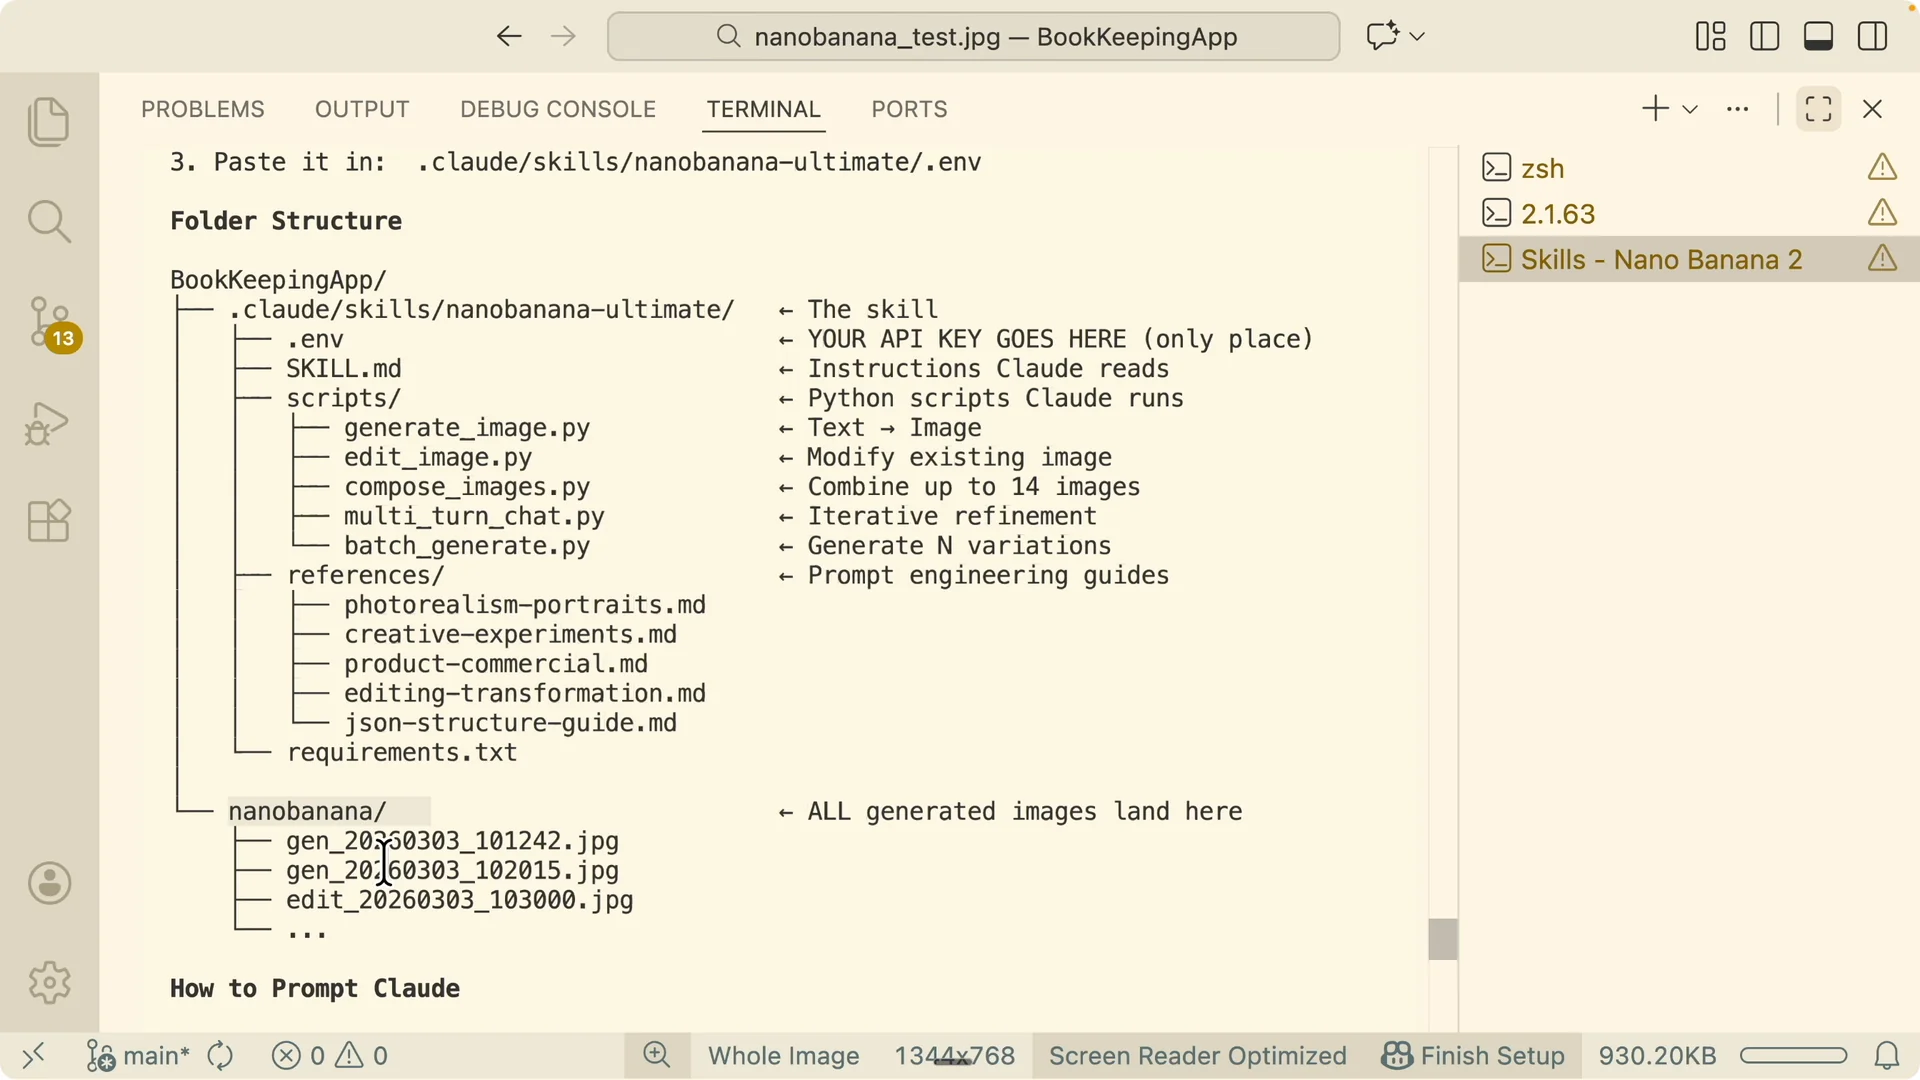
Your project root contains a nano-banana folder where all generated images are saved. The skill lives under .claude/skills/nano-banana-ultimate with these parts.
The .env file stores your API key. The skill.md file documents instructions.
The scripts folder contains the tools for generating, editing, composing, and referencing images. The references folder holds the prompt engineering guide.
The requirements file lists dependencies.
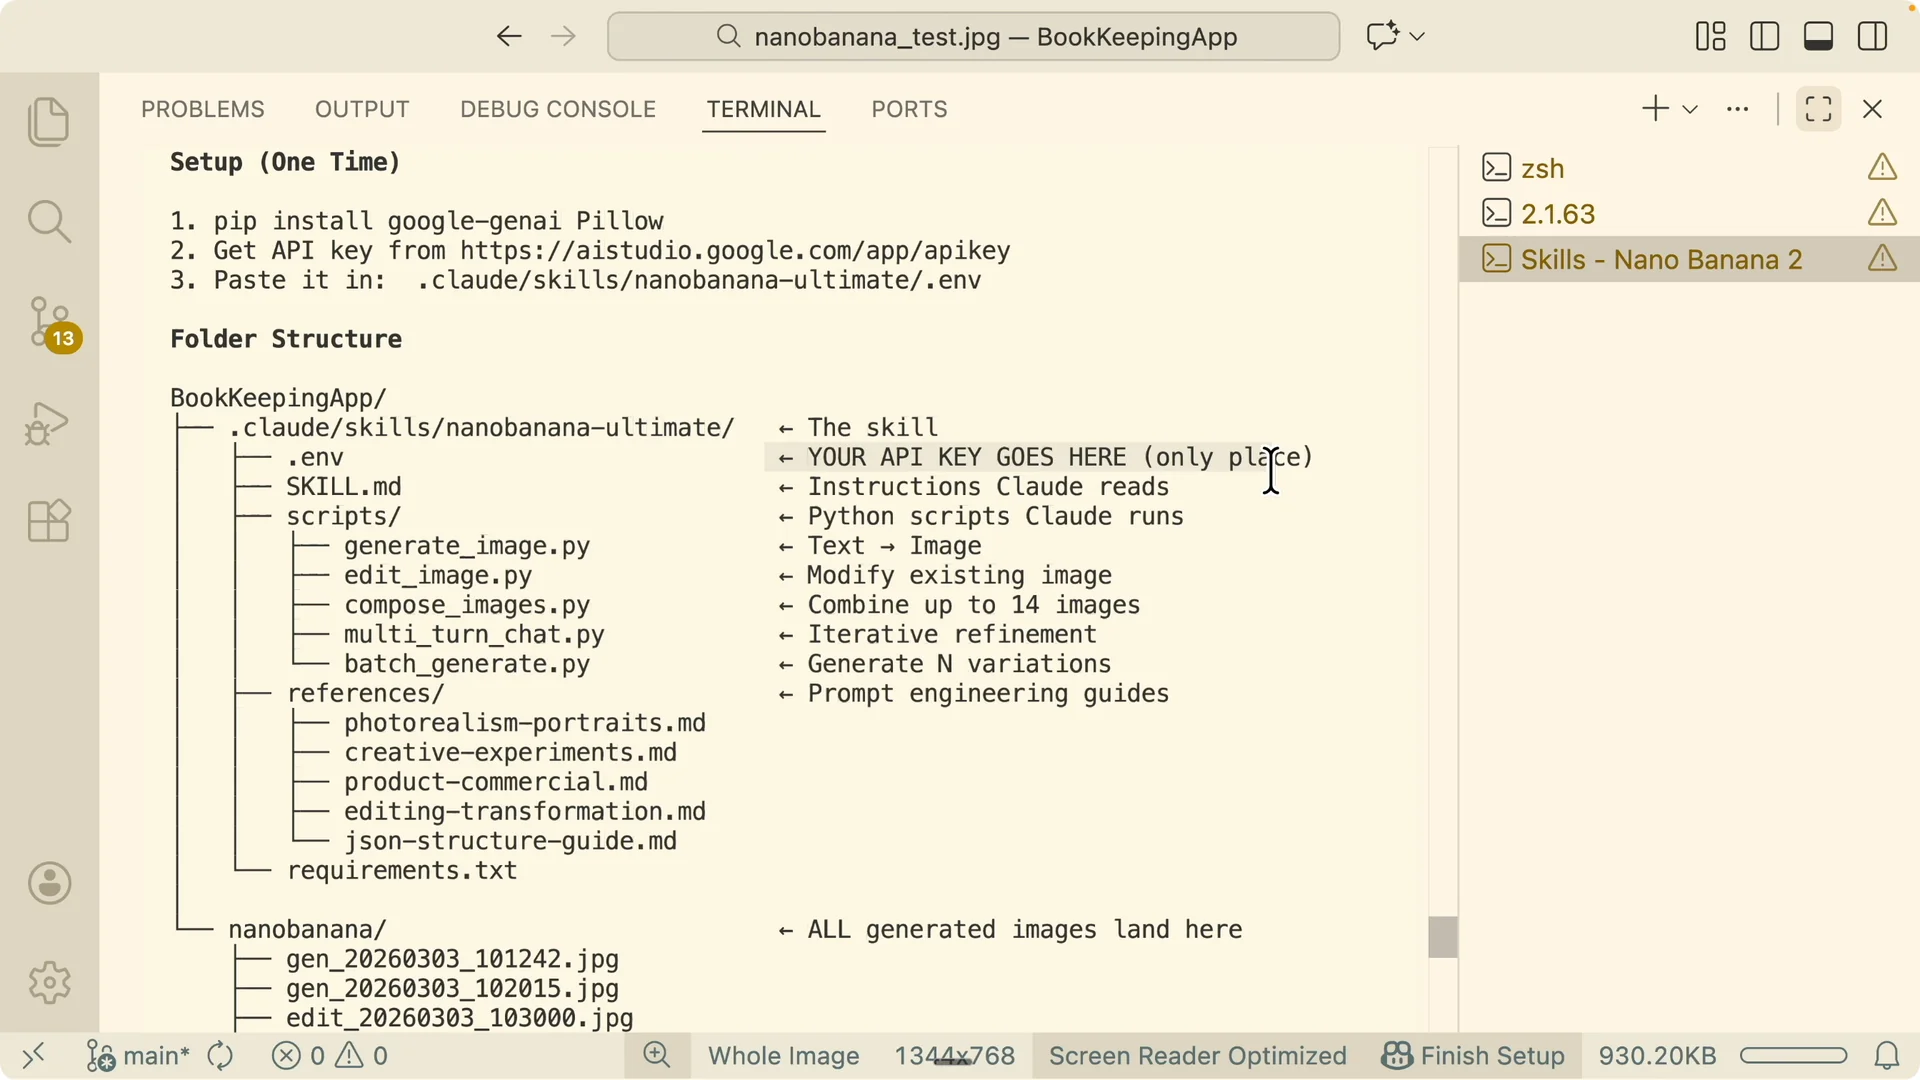
After generation, images save as JPEGs inside the nano-banana folder with a prefix that identifies the task type.
You will see names like generate-…, edit-…, compose-…, batch-…, and multi-turn-….
Prompting patterns and examples
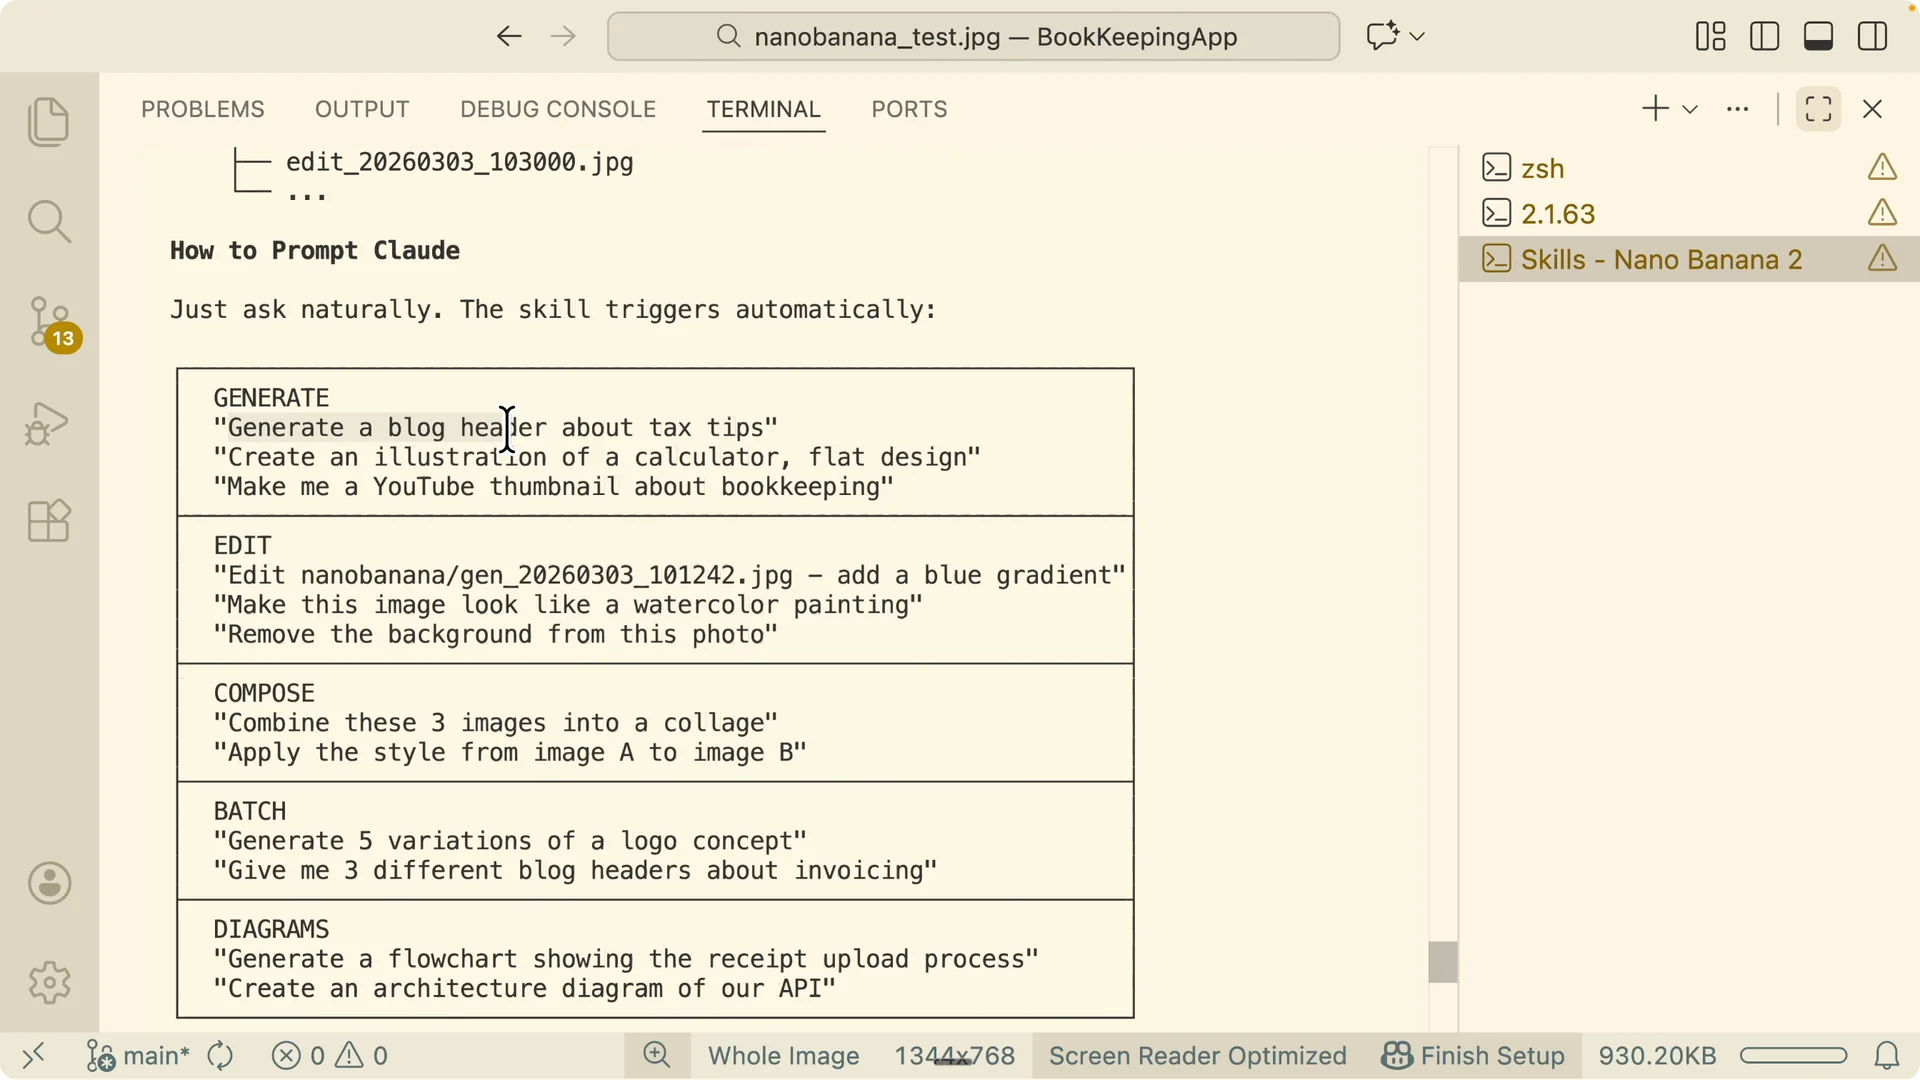
Ask Claude to generate an image directly. You can say, “Generate a blog header about tax tips.”
It will convert your prompt to JSON, enrich it with context, and call Nano Banana 2.
You can paste content from your blog and ask for a header image plus a supporting diagram.
The skill will plan aspect ratios for hero and card images and then produce them.
You can also ask it to increase resolution for a chosen output.
Edit an existing image
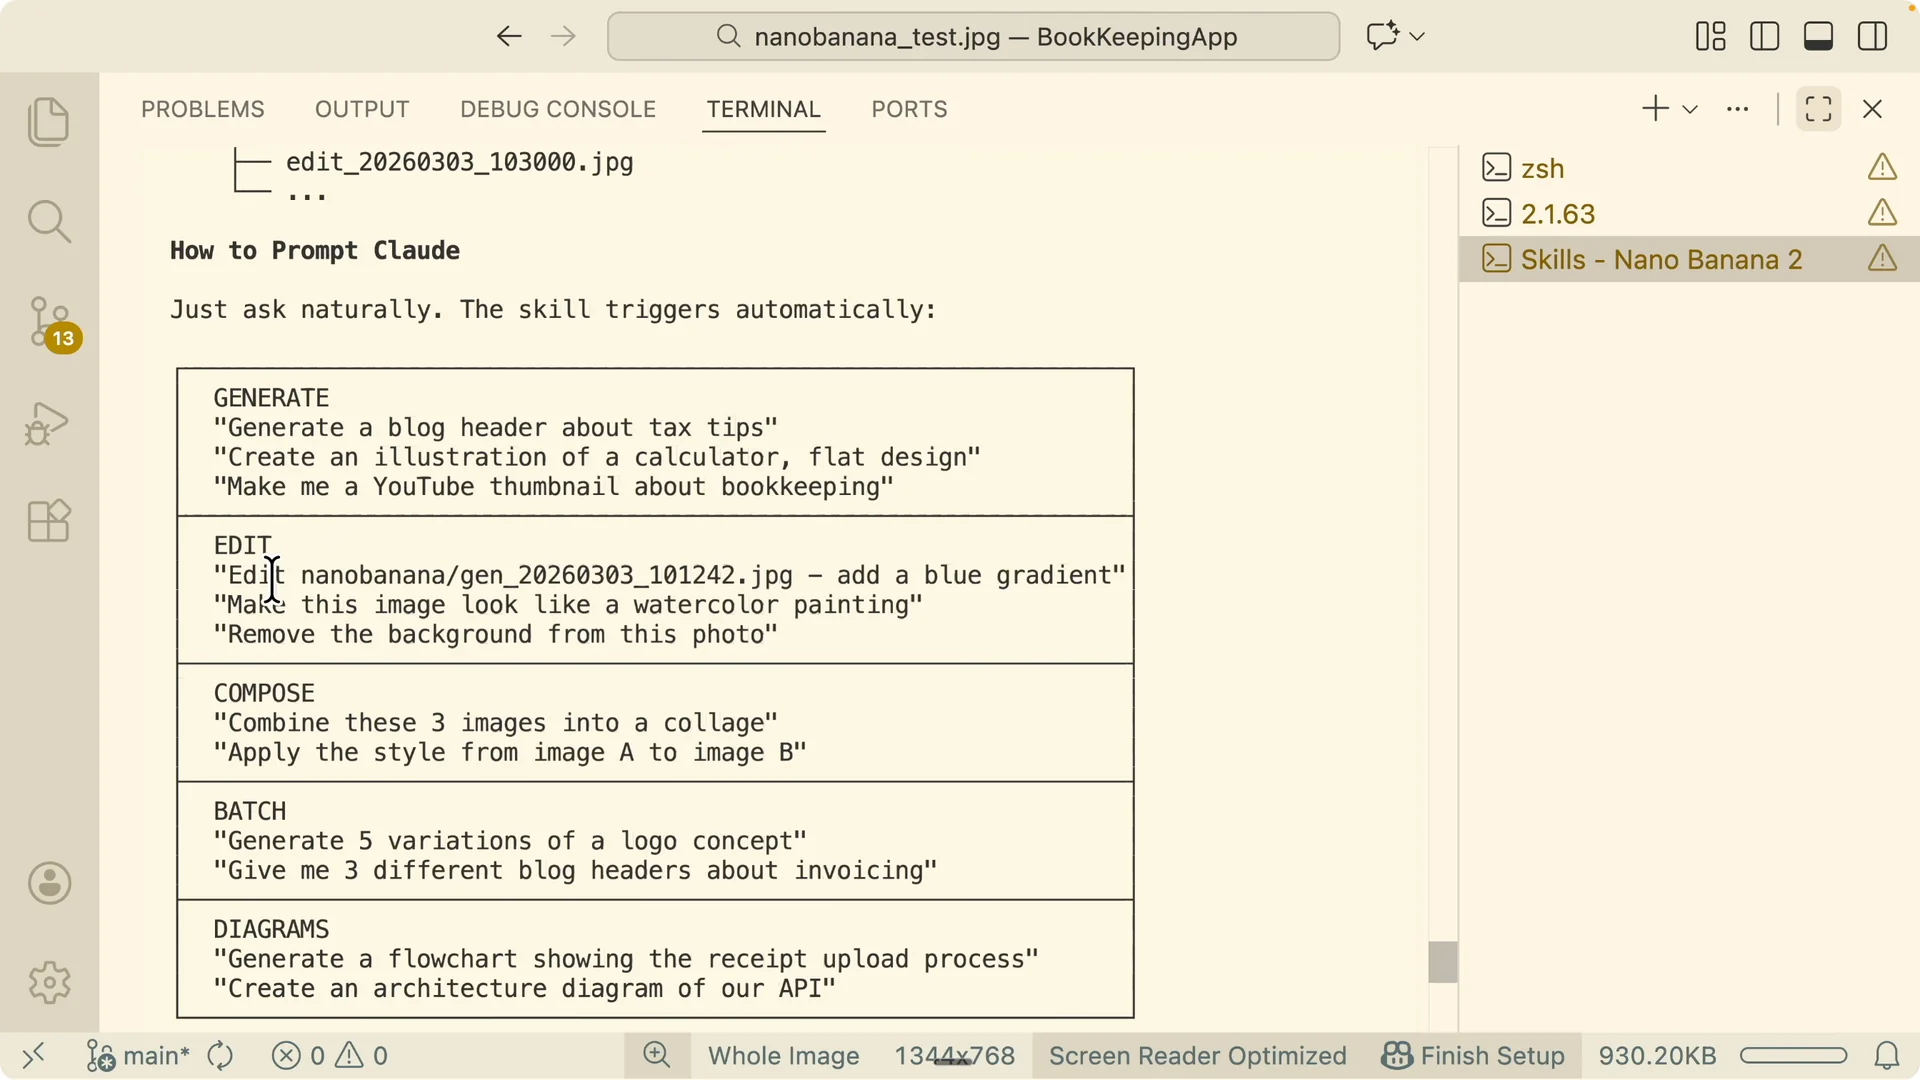
Provide an input image and ask for a change. For example, “Add a blue gradient,” “Make it watercolor,” or “Remove the background.”
The edit outputs save with the edit prefix.
You can also add a watermark by referencing the target image and specifying where to place the watermark.
The updated file will save to the same nano-banana folder or to a public assets folder if you specify a path.
Compose and style transfer
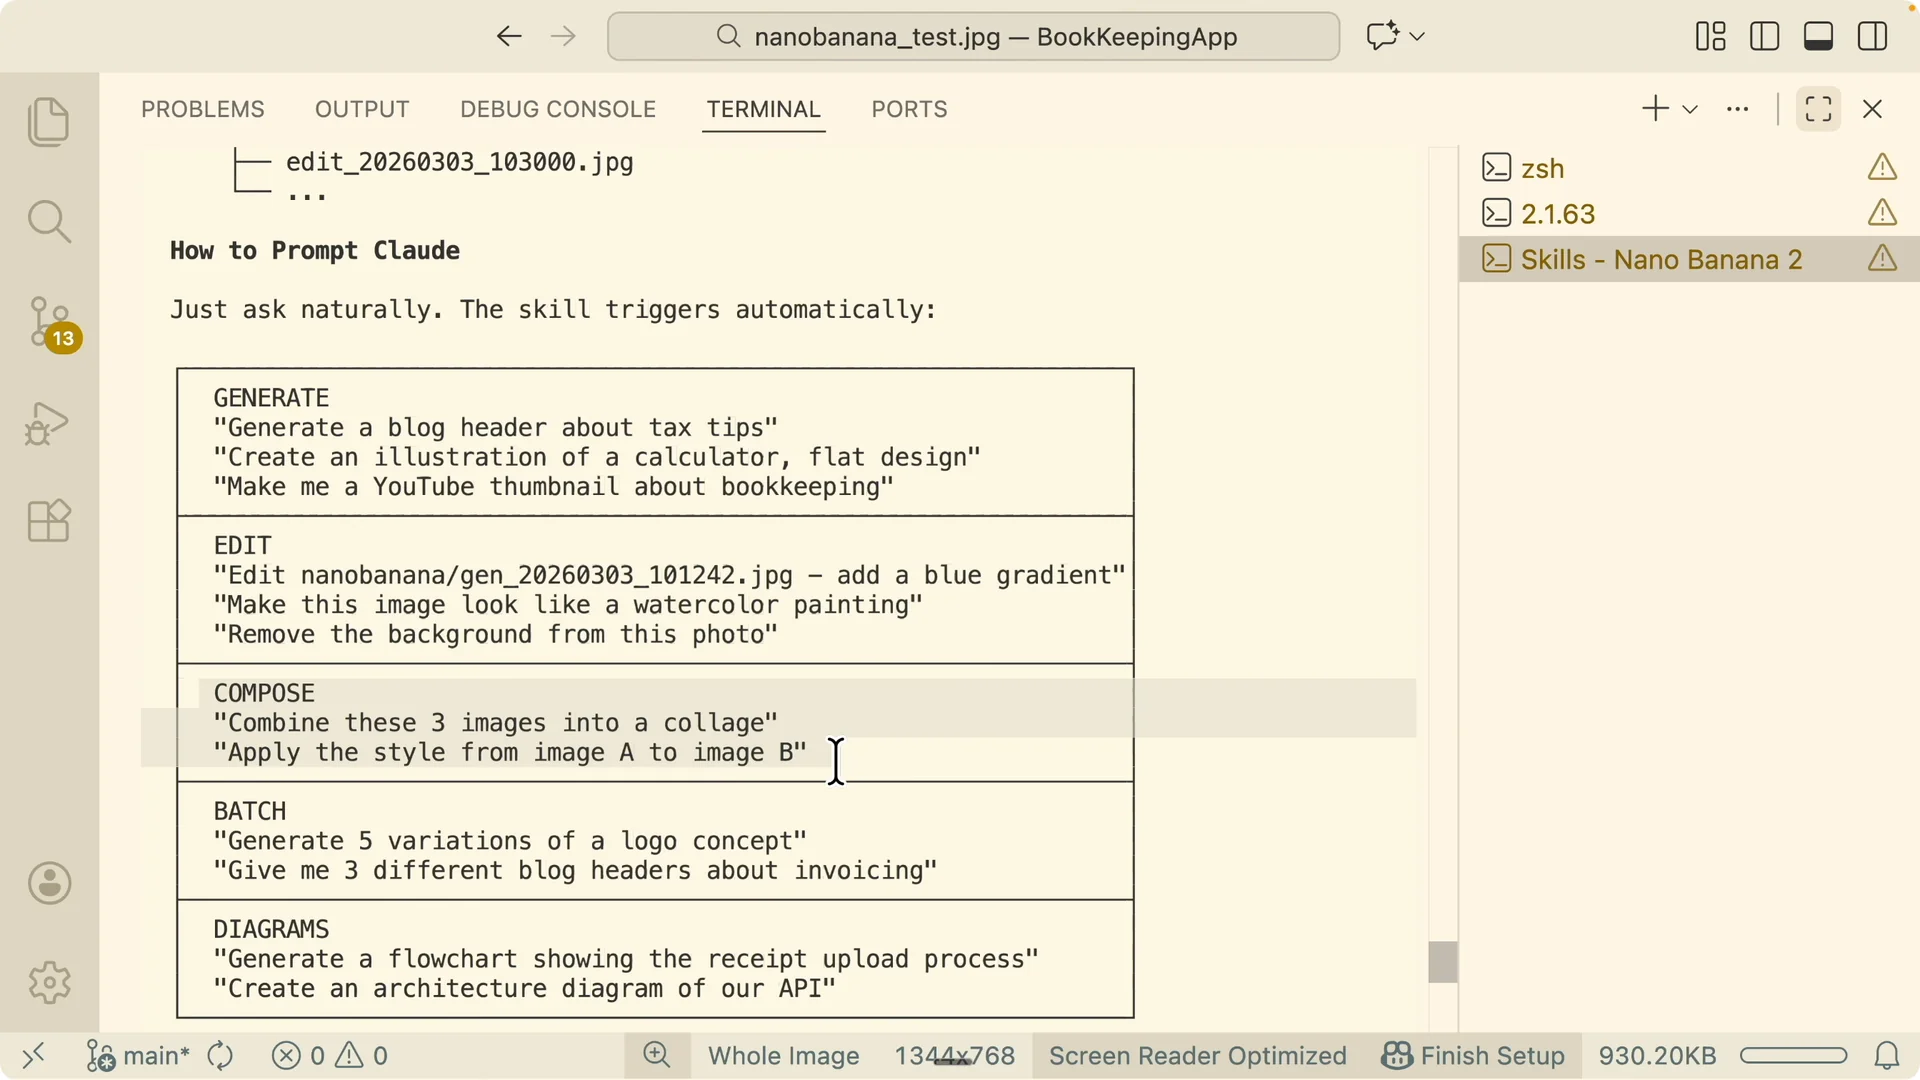
Compose lets you combine multiple images or apply a style from image A to image B.
Supply reference images plus your target.
The skill analyzes the style, color, geometry, and small-size legibility before calling Nano Banana 2.
Use design sites like Dribble for references, copy a few styles you like, and paste them for the compose step.
Tell Claude to match your theme colors and typography for brand consistency.
Read More: Playwright workflows with Claude Code
Batch generation
You can batch create multiple outputs in one request.
For example, “Generate five logo concepts,” or “Give me three styles of this diagram.”
The skill names the outputs clearly so you can review them quickly.
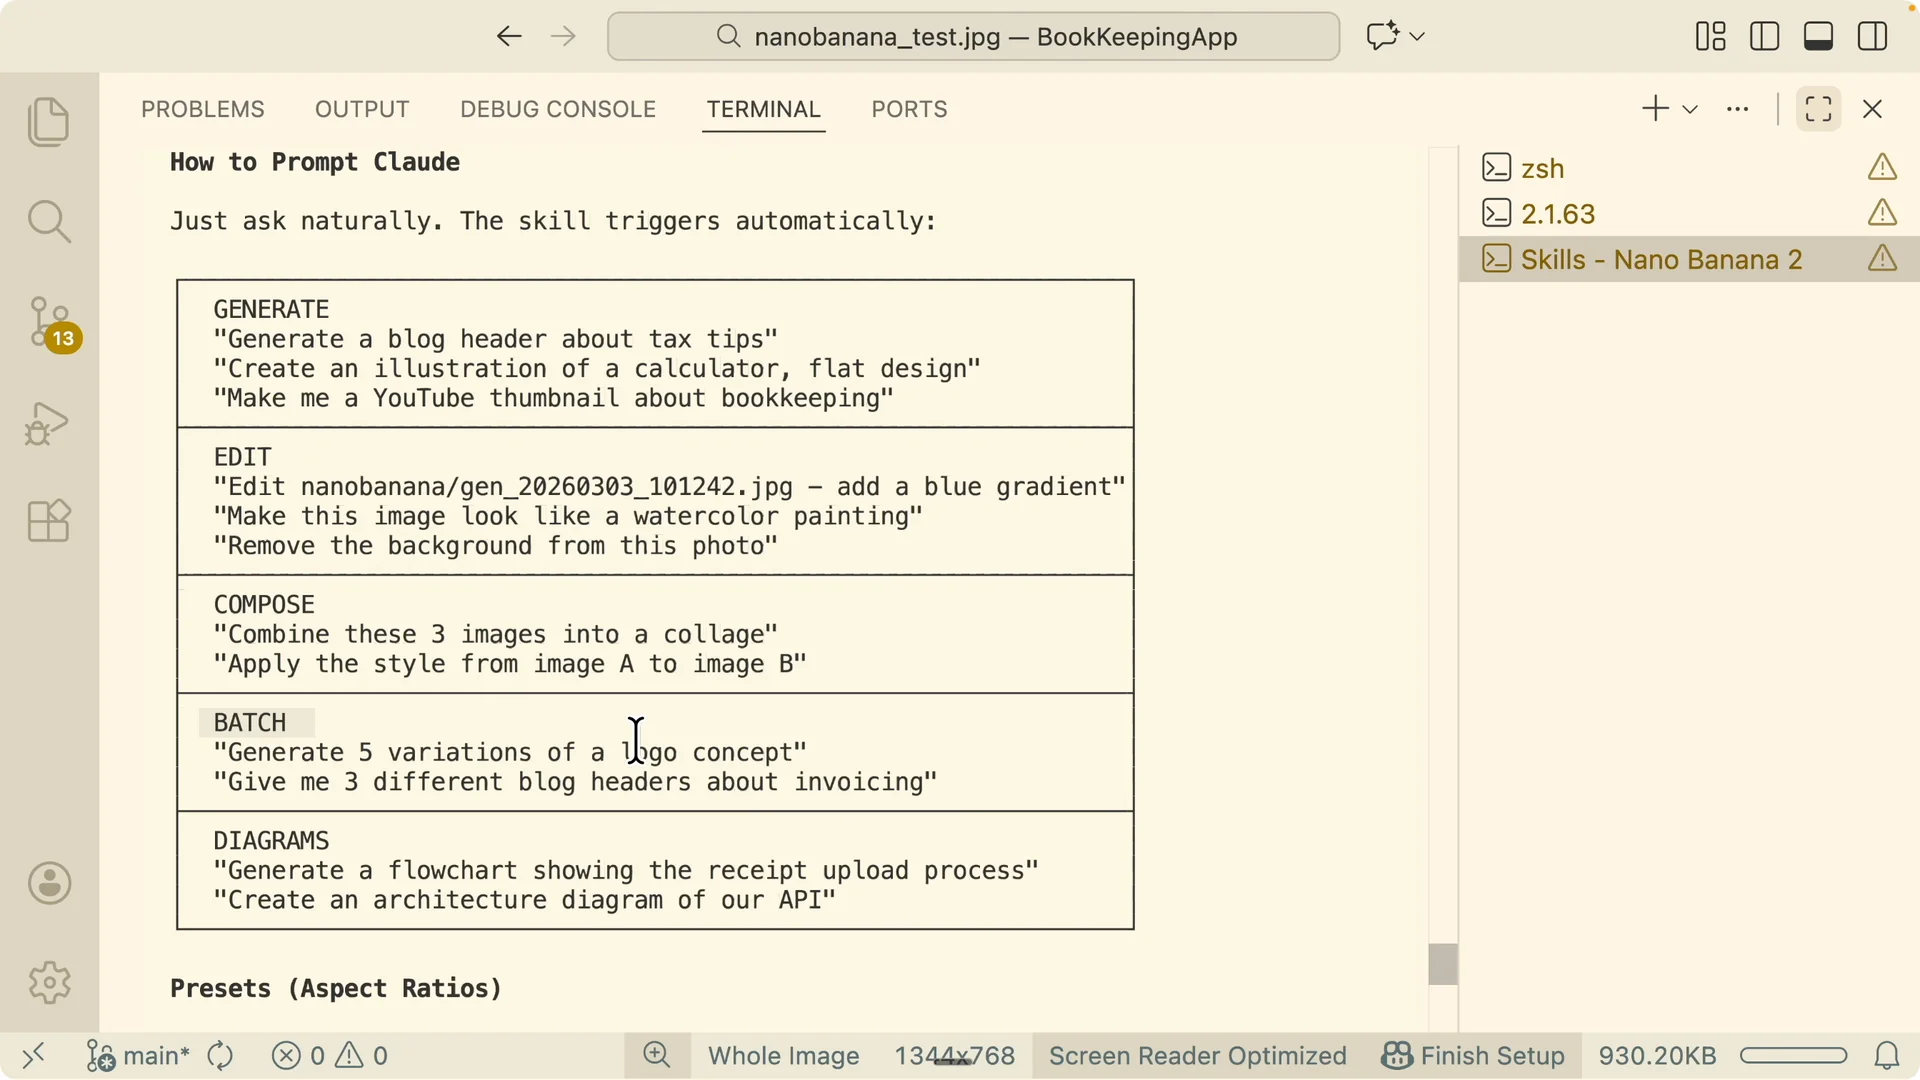
Use multi-round prompting to narrow in on a direction you like.
Then ask for focused variants of just that direction.
Diagrams and flowcharts
Ask for a flowchart, architecture diagram, or XY-style diagram for your blog post.
The skill can generate diagrams that look like Excalidraw sketches with accurate text and labels.
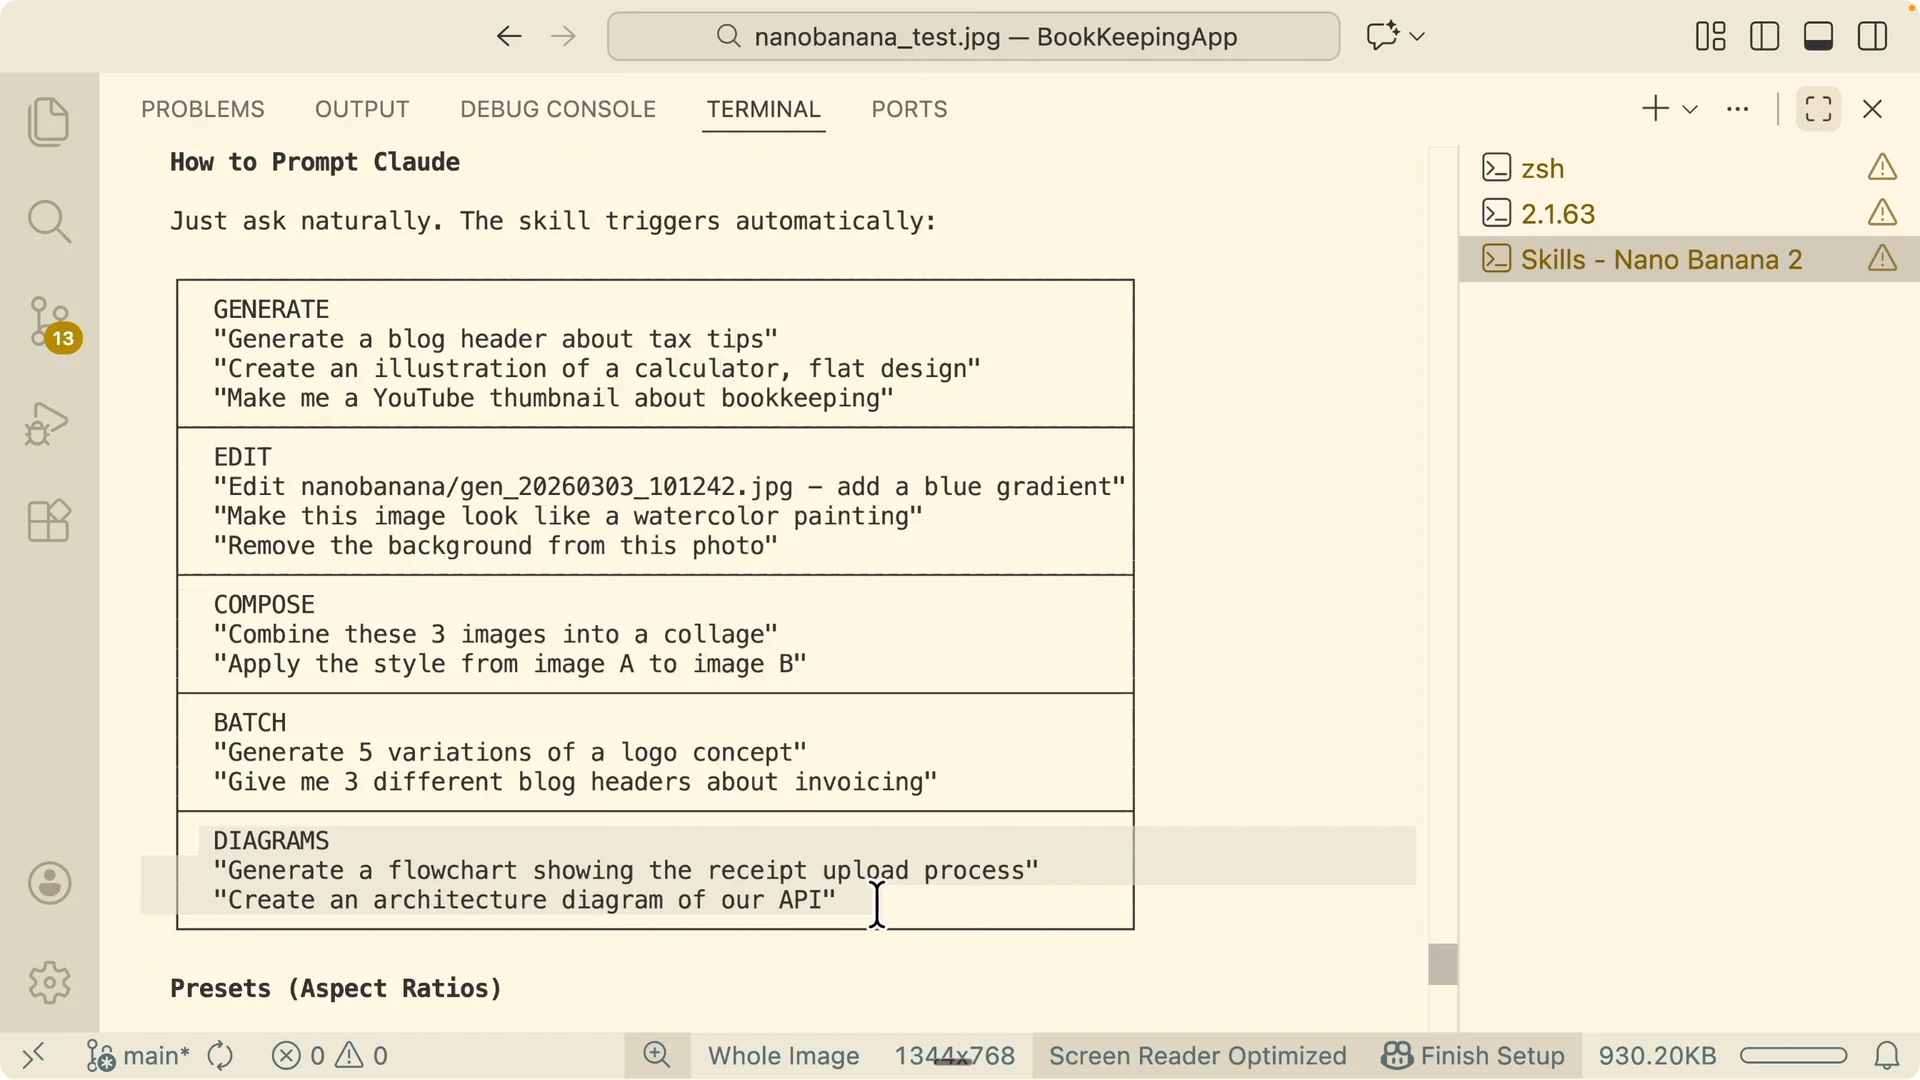
You can specify exact nodes, arrows, and captions.
The model respects the diagram style and produces consistent iconography and typography.
Model selection
By default the skill uses Flash for fast and good quality results at a budget-friendly cost.
If you want the best possible image, say, Use the Pro model for this task. Pro is a bit slower but produces the highest quality.
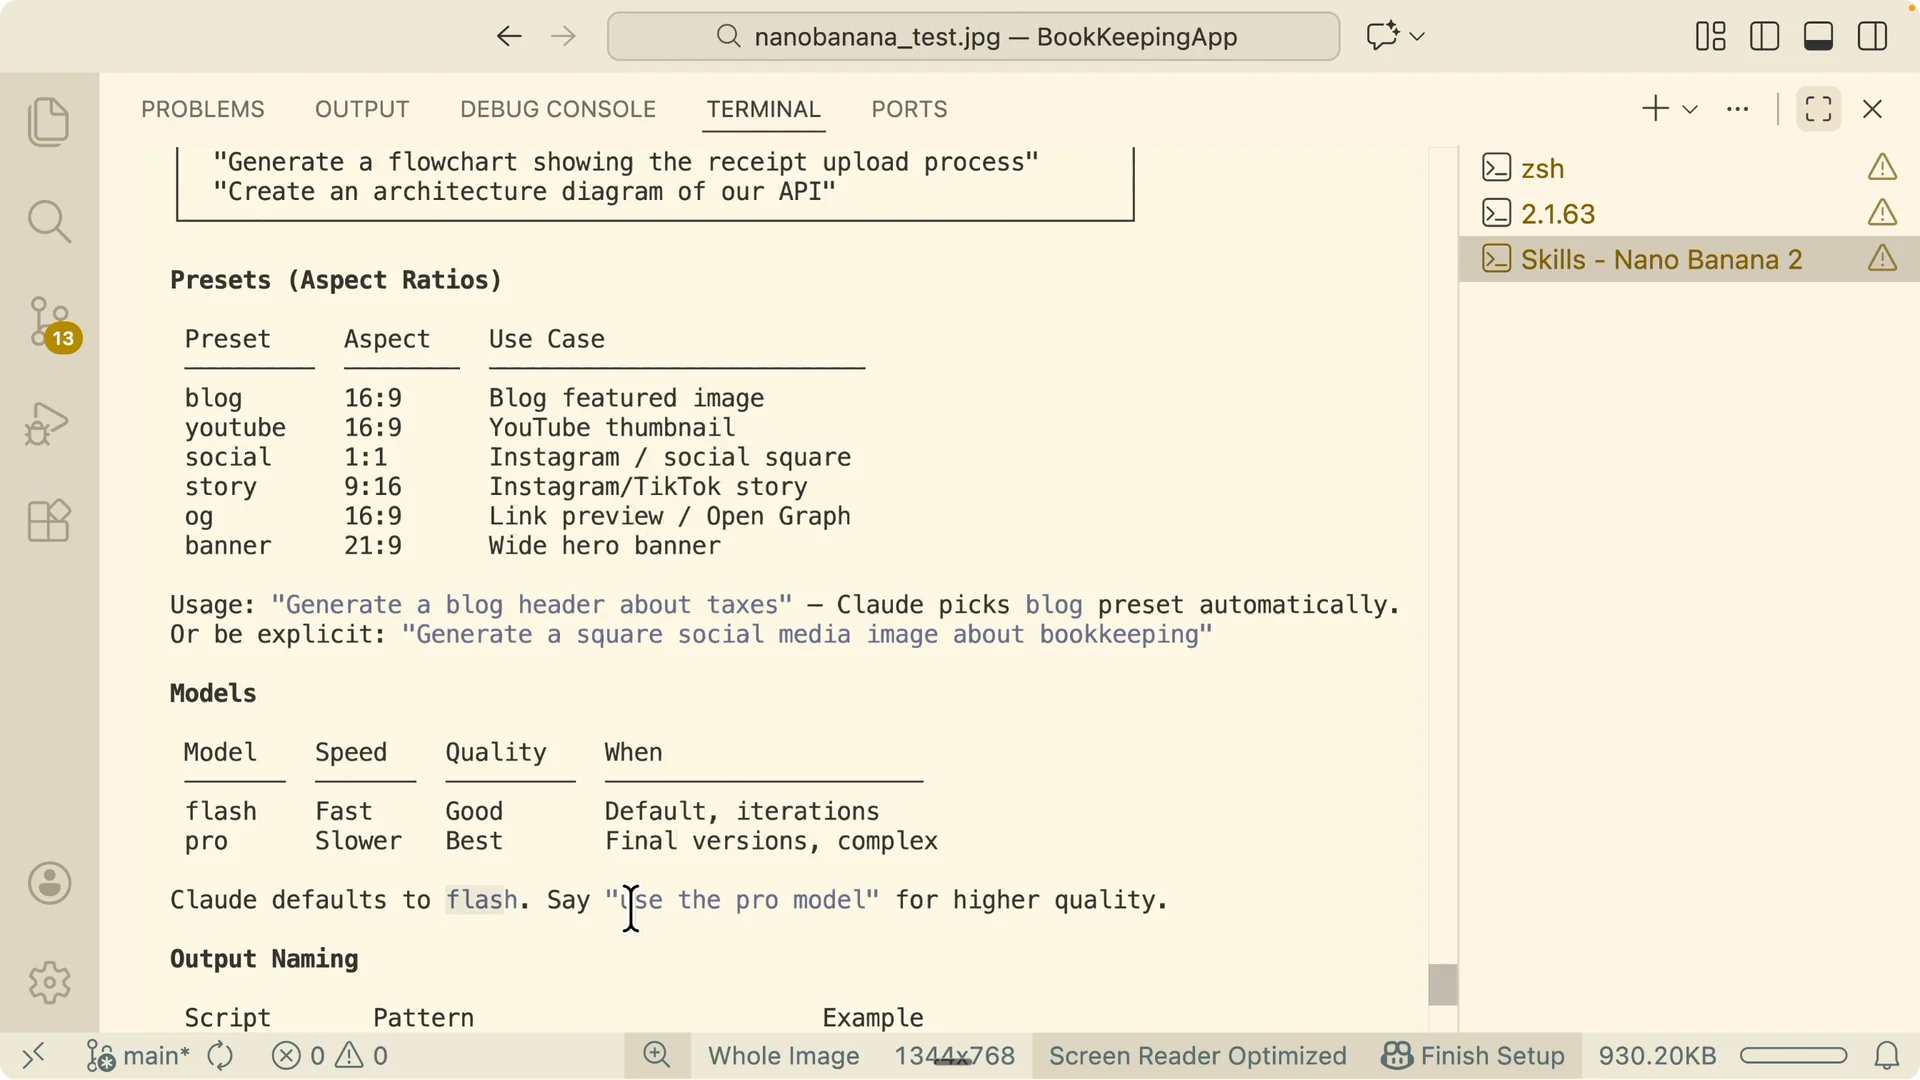
You can switch models per round. For example, explore concepts with Flash, then lock in finals with Pro.
Output files and naming
Outputs use a clear prefix that reflects the operation.
You will see generate, edit, compose, batch, and multi-turn.
This makes it easy to track variants across rounds.
All images land in your project’s nano-banana folder unless you direct the skill to save into a public assets path.
Pick your favorite and then request higher resolution or targeted refinements.
Example workflow: redesigning a logo with plan mode
I opened a fresh Claude Code session and triggered the Nano Banana Ultimate skill. I asked Claude to review my current logo, research competitor logos, analyze our theme and colors, and then batch design three directions: Open Ledger, Smart Receipt, and B Ledger letterform. It explored current assets, studied competitor logos, and then generated four variations per direction.
I picked a direction, asked for focused variants on the letter B, and requested refinements like adding a book motif, a subtle fold, or a shield.
I switched to Pro for the final round to maximize quality. After choosing the final logo, I had Claude apply it wherever the app displays the logo.
If you coordinate many of these steps on your desktop, see this guide for desktop task management with Claude Code.
Example workflow: blog images and diagrams
I took a full blog article and asked Claude to plan image specs for hero and cards. It produced header images plus an Excalidraw-like diagram showing steps such as import, categorize, match, and export.
The numbers, labels, and icons came out clean and consistent.
I selected the final diagram, asked the edit tool to add a watermark, and saved it to my public folder.
The styling stayed consistent across all images generated for the blog. Everything looked on-brand from headers to diagrams.
Tips and troubleshooting
If outputs miss small details, ask Claude to add explicit constraints into the JSON. Call out exact text strings, color codes, and icon rules. When style drifts, provide 2 to 4 reference images and use compose so the model locks onto your look.
If quality tops out on Flash, switch that round to Pro. Keep using clear filenames and prefixes so you can track versions across rounds.
Final Thoughts
Nano Banana 2 delivers its best results when you feed it structured JSON plus tight context. The Claude skill handles that translation, questions, presets, and multi-round planning for you. With generate, edit, compose, batch, and diagram tools in one place, you can go from rough prompt to accurate, brand-consistent images fast.